RUBASHINI A/P GUNASEGARAN [1081100871]
WORK IN PROGRESS
DESCRIPTION ON THE INDIVIDUAL IDEATION OF THE LINK
This page consist of all the images taken during the festival season in Batu Caves and attractions places over there.There are two categories of album in this link which are:-
a)The Festival Season Images
b)The Tourist Attraction Places
OBJECTIVE OF THE LINK
The main idea of the link is to expose the viewers to the images taken over there to give a rough idea how the place looks like and how the events are over there happens.As the saying the first impression is the most important impression.They always say "Picture speaks more then a Word" therefore we tried to focus on the images as it speaks more then the words I write on it.Besides that, the link is to attract viewer to visit
the blog all the time with images & video.
Pages That I Have Created
HOMEPAGE-The promotional video that I have created which is in the blog as well as in the website
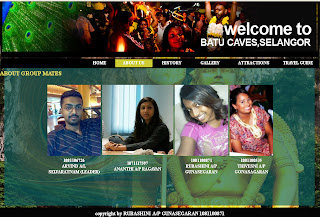
ABOUT US-A brief introduction about our group members.I have included:-
a) Images of the members
b)Student Name
GALLERY- Images of the two categories mentioned above.Images used in the Gallery are
images taken from my Sony Digital Camera and from Google search engine,keyword "batu caves". The images that are suitable for my website gallery page are saved.
FLASH BANNER-A slide show of two banners edited using photoshop in all the links in the website header using Flash.
PROMOTIONAL VIDEO-A promotional video with images that have been edited from photoshop to giva a slide show of it in the website .The aim is to promote Batu Caves,Selangor.
<<A showcase of Hindu deities status and mythological arts in caves>>
 |
| Statue |
 |
| A devote taking 'kavadi' fullfilling his vows to god |
 |
| Deities Statue |
 |
| Deities Statue |
 |
| Deities 'Lord Muruga' |
 |
| During Thaipusam |
 |
| During Thaipusam |
 |
| During Thaipusam |
USE OF TOOLS
MOZILLA FIREFOX- TO BROWSE MY FILES
PROMOTIONAL VIDEO
Step 1
editing all the images in photoshop using soft light brush tool
merging the two images
Step 2
importing images to places.placing images in each key frames,and converting the images into graphics&reducing alpha as i did to flash banner.
(fade in & out effect)
FLASH BANNER
 |
| Image of the flash banner |
The banner is designed using adobe Photoshop CS3 & Macromedia Flash CS3 to create it.
Step 1
Designed two images banner in photoshop.
Two Image combination.These are the images that I used, took it from Google images search engine and my Digital Camera.I have used softlight to blend and merge the images with the peacock.
Step 2
Use Macromedia Flash cs3.
Saved the 2 banners & bring it to macromedia flash.
Import the images to library.
Step 3
Drag in the images from the library
Convert it to graphics.
Step 4
Insert keyframes
Step 5
Then right click for motion tween.
Towards the end of the key.reduced the alpha,so that the next banner can be seen.
REFERENCE/TUTORIAL LINK
Layout Design For The Website
Images that been used:
 |
| peacock feather |
|
Step 1
I have used lord' murugan' photo as the background.The reason is to highlight its a batu caves & all about Thaipusam event can be found here in this website.
Step 2
Draw the green rectangle,using rectangle marquee tool in photoshop.Reduce the opacity so that it will give glassy and screen look for the content.
&I overlay with the peacock feather.
DESIGN OF GUI
FLOW CHART OF THE INDIVIDUAL SITE
SCREEN SHOT FOR THE FINAL OUTPUT OF HOMEPAGE
SCREEN SHOT FOR THE FINAL OUTPUT OF ABOUT US
SCREEN SHOT FOR THE FINAL OUTPUT OF GALLERY
PHOTOSHOP: GUI INTERFACE & FLOWCHART
MACROMEDIA FLASH : ALBUM GALLERY
DREAMWEAVER : GENERATE THE SITE USING GUI CUSTOM TEMPLATE.


